Transitioning from the child being read to, to the child doing the reading can be a stressful time. But in actuality, it doesn’t have to be. More importantly…it shouldn’t be. This should be a smooth transition. (Read How to Grow a Reader)
For me, this has become one of my favorite developments in our children’s lives. There is nothing cuter than a child reading out loud his first books.
I’ve had the joy of teaching all four of our children to read and I also tutor public school kindergarten children. While I am far from an expert, I’ve learned some tips along the way. In this second post in this series, here are some ideas to remove the stress from the process.
Developmentally Ready
If you remember nothing from this blog post than this statement, please remember this: Being able to truly read (not just memorize words) is a developmental milestone. Just as you can’t force a child to crawl or walk…you can not force a child to read. It is a process that requires developmental maturity.
I’m not the only one who believes this. Read what HealthyChildren.org says:
Most children learn to read by 6 or 7 years of age. Some children learn at 4 or 5 years of age. Even if a child has a head start, she may not stay ahead once school starts. The other students most likely will catch up during the second or third grade. Pushing your child to read before she is ready can get in the way of your child’s interest in learning.
The Learning Process
To begin the reading process, teach your child the phonetic sounds of each letter. This is the focus of the ABC Jesus Loves Me 3 and 4 Year Curricula. (e.g. a says /a/ like apple, b says /b/ like bear)
Remember that when teaching consonants, do not add a vowel sound at the end of the consonant. For example, the letter B says /b/, which is not the same as /buh/. Likewise, the Letter K says /k/ and not /kuh/. Be very careful with letters such as H, B, K, D, and P. While there may seem to be a subtle difference when teaching the single consonant, adding a vowel at the end will have negative affects when the child begins putting together consonant and vowel sounds to form words.
For the next step, the child will put together and separate the sounds. I love how Wow! I’m Reading! breaks up the process. Here is a list from easiest to most difficult.
1. Compound words: cow…boy [cowboy]
2. Syllables: pen…cil [pencil]
3. The first sound with all of the others: b…ag [bag]
4. All but the last sound: me…t [met]
5. Each sound separately: m..a..p [map]
While driving around town, I gave Peanut split-compound words allowing him to put them together for practice. Then I separated two-syllable words for him to combine. Once he mastered that, we moved to the next step in the above list. The final step was putting three sounds together to create a CVC word (consonant, vowel, consonant). These are words like hat, tip, man, dog, etc.
As a final step we moved to nonsense words (e.g. dat, bap, mip)

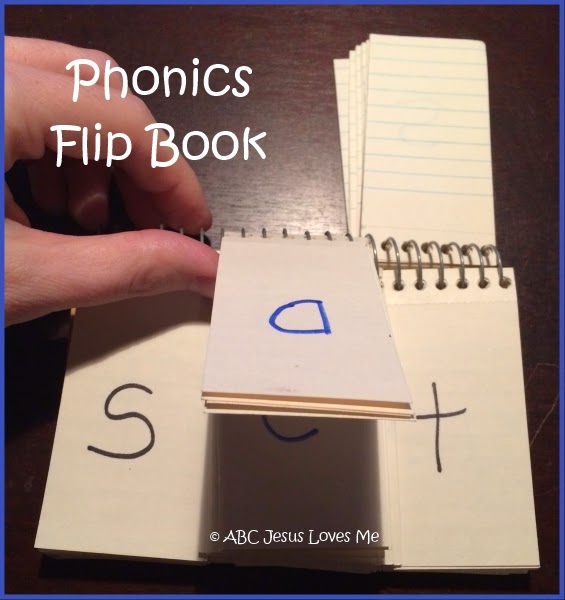
Phonics Flip Book
One of my favorite tools to work on CVC words is the Phonics Flip Book shared by Trish as Preschool Playbook. (While she no longer updates this blog, there is a wealth of wisdom archived.) When I first saw this idea, I envisioned it being great for rhyming. I quickly realized that it was a wonderful beginning reading tool to help children learn to put together phonic sounds to create words.
Supplies:
Wirebound Index Cards
Scissors
Marker – 2 Different Colors

Directions:
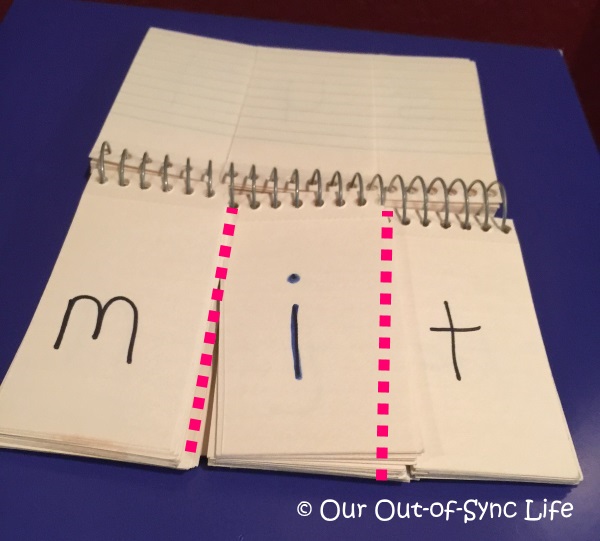
Vertically divide each index card into three equal sections. Cut, separating each card into three sections, but leave all three sections on the wire binding. (See pink lines in the image above.)
Label each of the three sections with letters (a-z), using black for the consonants and blue for the vowels (a,e,i,o,u).
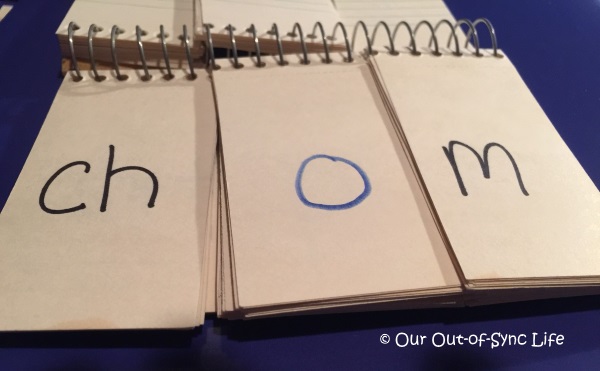
Because I had additional cards left, I added a few blends and consonant/e endings. Add or subtract depending on the number of cards in the wirebound book. But remember that this is higher level learning and should not be introduced at the beginning. (No particular order)
Column 1: ch, sh, th, gr, cl, bl, fl, gl, pl, sl, br, tr, sm, sc, st
Column 2: a, e, i, o, u (I repeated only the vowels for easy movement between words.)
Column 3: ch, sh, th, ck, nt, nk, ed, nd, de, be, ne, le, te
Using the Phonics Flip Book
The objective of the phonics flip book is for the child to learn to combine consonant and vowel sounds. Some words will be “real” while others will be nonsense. Still others will be real words but will be spelled incorrectly. Begin with real words and real spelling.
Very Important: In order for the child to sound out the words, the child must know the phonetic sound of each letter. This activity will not be successful without this prior knowledge.
I like to begin with “at” words. Place “b” in the first column, “a” in the middle, and “t” in the last column.
Ask the child to point to each letter and say the phonetic sound. Instruct the child to hold out each sound until saying the next. (e.g. bbbbbbbbbbaaaaaaaaat) This will greatly help the child hear the word. Repeat saying each sound until the child hears the word and says “bat.”
Next, rotate the first column to letter “c.” Again assist the child in sounding out the word. Once the child has discovered the new word, move on to the next letter in the first column to create a real word. Since “dat” is a nonsense word, move on to a real word for starters. Real words are easy for the child to read at first.
With time, the child will learn that these are also rhyming words and will no longer have to sound out the last two letters.

After the child has perfected the single letters, add nonsense words and blends.
Very Important: It has been my experience that the child is either ready to do this activity or not. If after a few attempts, my child didn’t catch on to the patterns, we put the flip book away for a couple of weeks. We continued working on individual phonetic sounds, and combining and subdividing compound and simple words (e.g. camp-fire, pen-cil, b-ag).
In my experience, once the child is able to read the words on the flip books, he or she is ready to read beginning level books…which is what we will cover in next week’s blog post.
Disclosure: I am not an expert and am simply sharing my experience in hopes that it will helpful to you. Thank you to my aunt for her 39 years of teaching expertise in helping me write this.